

Everything You Need to Know About the Mural Painting Process
|
|
Time to read 5 min
|
|
Time to read 5 min
Murals can add so much to your space. Whether you're looking to level up your home, business, school, or community space, a mural will add color and joy and also help tell your story.
You've taken a look around and decided that a mural is a strategic investment you're ready for (and for more about that, check out this article!). But what happens next? Here's everything you need to know about the mural painting process, including working with a muralist and what you can expect when working with a professional muralist.
The first thing you need to do is some research. Identifying an artist whose style aligns with your preferences is essential. Some muralists have a distinct and specific style, while others operate as generalists and can execute a range of art styles. Selecting an artist whose work you loves means that you know what you're getting. It's not reasonable to hire an abstract artist and expect that they will create something photorealistic! Become familiar with their work so that your expectations are lined up.
Pinterest and Instagram are great places to find muralists and look for inspiration. Remember that a muralist doesn't necessarily have to be local to you, and could either travel or design a vinyl piece to be installed by a local contractor.
Before reaching out to an artist, there's some information you should gather ahead of time. A muralist is going to need to know the answers to these questions:
Before I meet with new clients, I ask them to fill out a mural inquiry form so that I can have a baseline understanding of where they're starting from. It's also a good way to prompt them to collect the information I will need to be able to provide them with an estimate.
💡 Being prepared with this information will make your process more efficient! This is all information the muralist will need to know in advance.
A brief note about budget:
Muralists have a wide range fees, usually depending on a number of factors, including: how big the space is, how much coverage you're looking for, how complex the design is, and their experience. In addition to the muralist's labor and design fees, you should expect to pay for supplies like paint and equipment rentals, if necessary.
Many muralists have a minimum project rate, myself included. There's a lot of behind the scenes work that goes into mural painting! Don't be afraid to ask your muralist about their minimum interior and exterior rates and if they have travel rates. You can also ask about square footage rates. Many muralists will provide you with a tiered estimate that factors in coverage, complexity, and surface.
I like to meet with clients for a quick 30 minute introductory call after I receive an inquiry. This helps me learn more about your goals and preferences, and ask any questions about your space. It's a great time to get to know each other to see if we're a good fit to work together.
At this point, I have all the information I need to provide you with a free moodboard and project estimate. As I mentioned earlier, I like to provide options at different price points so that I can accommodate a range of budgets. Although different artists have different proposal styles, many will include a moodboard to best communicate style and complexity. I also include an initial timeline based on both of our schedules.
Woohoo! You've decided on a pricing option and you can't wait to get started. We're almost there.
First, you need to sign a contract. This is to document everything we agree on for the project. Here are some things I include in my contract:
Once the contract has been signed and a 50% deposit has been paid, your spot is reserved and we can get to work!
I like to provide clients with two or three distinct concepts based on our initial conversation. I also provide mockups, so they can see what the concept will look like in their space. It can be hard to visualize what the art will actually look like once it's off the page or screen!
Here's an example of a mockup I provided to my client.
After you decide on your concept and general direction, it's time to revise and really dial in. This is a great moment to tweak color and incorporate any feedback.
Here's an example of what the above concept looked like after a round of revision:
💡 Because I design digitally, it's important to note that color can appear different in the final mural painting. We can get very close, but it will never be as bright, because digital drawings are made of light and paint is made of pigment!
And now it's time to get to work installing your mural! Muralists have different preferences for how the transfer the approved design onto the wall, depending on time, space, and skill set. I often prefer to project the design onto the wall, but there are some tight spaces where that can't work because of the limits of the projector. Muralists can also transfer the design to the wall using a grid, pouncing with transfer paper, special AR apps, or even freehand.
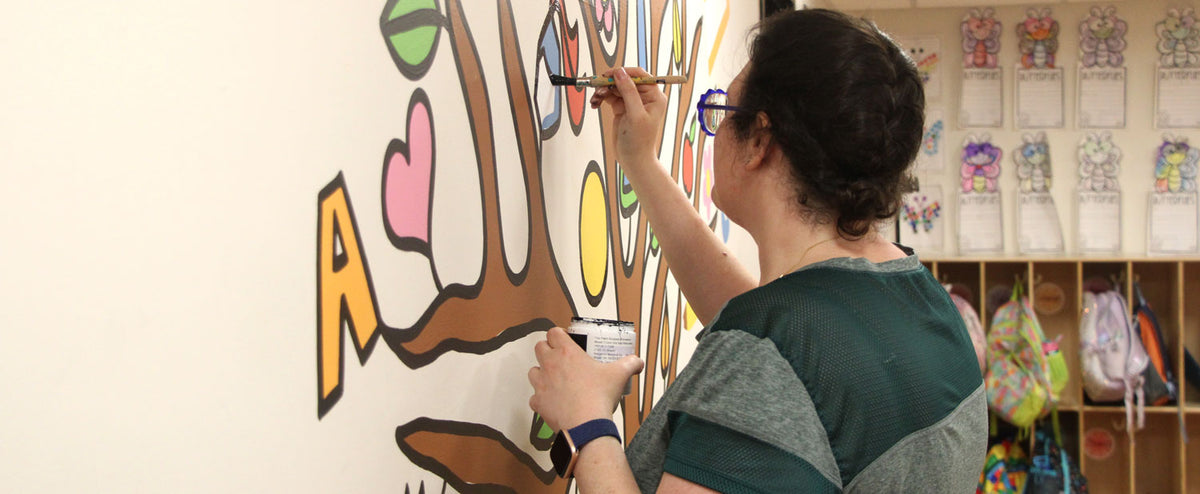
And now my favorite part of the whole process: the actual mural painting! I get to work applying color to the transferred design. Muralists have different processes and techniques here, as well. I often work color by color.
Final payment is due upon completion of the mural, and you get to enjoy your custom artwork for many years to come!
For most murals, there's no need for any special kind of top coat or sealant, since interior and exterior paints are designed for specific conditions (such as weather, UV exposure, and high traffic areas that need cleaning). In some cases, you may want to consider an anti-graffiti coat.
That's everything you need to know about the mural painting process, from first hiring an artist to the completed art. Remember that each artist has their own preferences, business practices, and techniques, but I've found this to be a standard process.
So, are you ready to transform your space with some custom art? Be in touch!


